Connecting your Instagram account to Buffer
This article explains how to connect an Instagram account to Buffer, reconnect a channel that has stopped working, and troubleshoot common connection errors. It’s designed for anyone using Instagram with Buffer, whether you’re managing a single account or multiple client accounts.
You can connect a Personal account or a Professional (Business or Creator) account. Linking your Instagram account to a Facebook Page is optional and is only required for advanced analytics and adding locations to posts. You can still connect and publish to Instagram without a Facebook Page.
💡Before you start, follow these tips for a smoother connection:
- Use a computer and a web browser rather than the Buffer mobile app. Connecting and refreshing channels is more reliable on desktop.
- Make sure you’re logged in to the correct Instagram account before you begin. Buffer will connect the Instagram account that’s currently active in your browser.
- Temporarily turn off any VPN, ad blocker, or privacy extension, as these can interfere with the sign-in process.
- Try using an incognito or private browsing window to prevent your browser from automatically using the wrong Instagram or Facebook account.
In this article:
- Connecting an Instagram Professional (Business or Creator) account with your Instagram login
- Connecting a Professional Instagram (Business or Creator) account through a linked Facebook Page
- Connecting the right account when you manage more than one Instagram account
- Connecting a client's Instagram account (for agencies)
- Troubleshooting common connection errors and issues
Which Instagram connection method should I use?
Buffer can connect to both Personal and Professional (Business or Creator) Instagram accounts. The right method depends on your account type and the features you need. The features available to you depend on how you connect, so it's worth choosing before you start.
|
Connection method
|
Available on
|
Features you get
|
|---|---|---|
| Personal account (no login required; uses mobile notifications to help you publish manually) |
All plans
|
✅ Yes - Notification publishing* ❌ No - Analytics ❌ No - Comment management features *(Learn more about Using notification publishing.) |
|
Professional (Business or Creator) account through your Instagram login (log into instagram.com with your username and password) |
All plans. Recommended for Buffer's Free plan |
✅ Yes - Notification publishing ✅ Yes - Automatic publishing ❌ No - Analytics ✅ Yes - Comment management features |
| Professional (Business or Creator) account through a linked Facebook Page (log in with a Facebook profile that's an admin of the Facebook Page linked to your Instagram) |
All plans. Recommended for paid plans, and for anyone who can only access Instagram through Facebook or Meta Business Suite
|
✅ Yes - Notification publishing ✅ Yes - Automatic publishing ✅ Yes - Advanced analytics & reporting ✅ Yes - Comment management features ✅ Yes - Adding locations to posts |
📝 A few quick pointers:
- Not sure what kind of Instagram account you have? Check out our guide here.
- You don’t need to connect a Facebook Page to connect or publish to Instagram. A Facebook Page is only required for advanced analytics and adding locations to posts.
-
If a channel shows as Unavailable when you try to connect it, it's likely connected to another Buffer organization. See Why channels are appearing as "Unavailable" when attempting to connect them to Buffer.
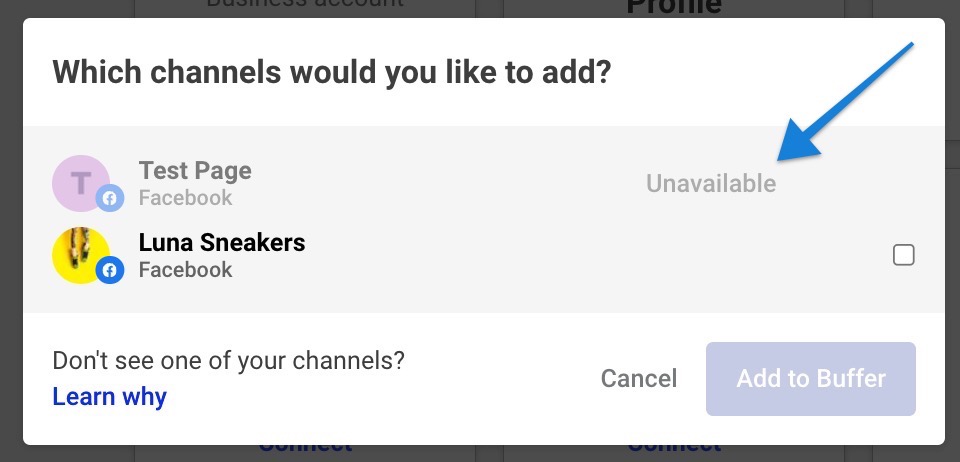
- If the only way you can connect to Instagram is through Facebook, please use these steps.
- If you manage more than one Instagram account under a single Meta login, make sure you're logged into the right one before connecting. See how to switch accounts here.
Connecting an Instagram Personal account
To connect an Instagram Personal account, head to your Channels page in Buffer, choose Instagram, and select Setup a Personal account. A Personal account uses mobile notifications to help you publish manually. You don't need to enter an Instagram password for this method.
- ⚠️ Due to Instagram’s API limitations, Personal accounts can’t:
- Publish posts automatically to Instagram
- Display analytics or comments in Community
- If you'd like to publish automatically and use Analyze, switch your account to Professional (Business or Creator) and authorize through Facebook: Getting advanced analytics and locations for your Instagram account.
- 📝 Scheduling to Instagram Personal accounts is only available on our new plans. On a Legacy plan? Get in touch with us at hello@buffer.com to discuss your options!
Steps:
- In Buffer, head to the Channels page, or click your profile avatar in the bottom left of your dashboard and choose Channels from the menu.
- Click Connect Channel and select Instagram.
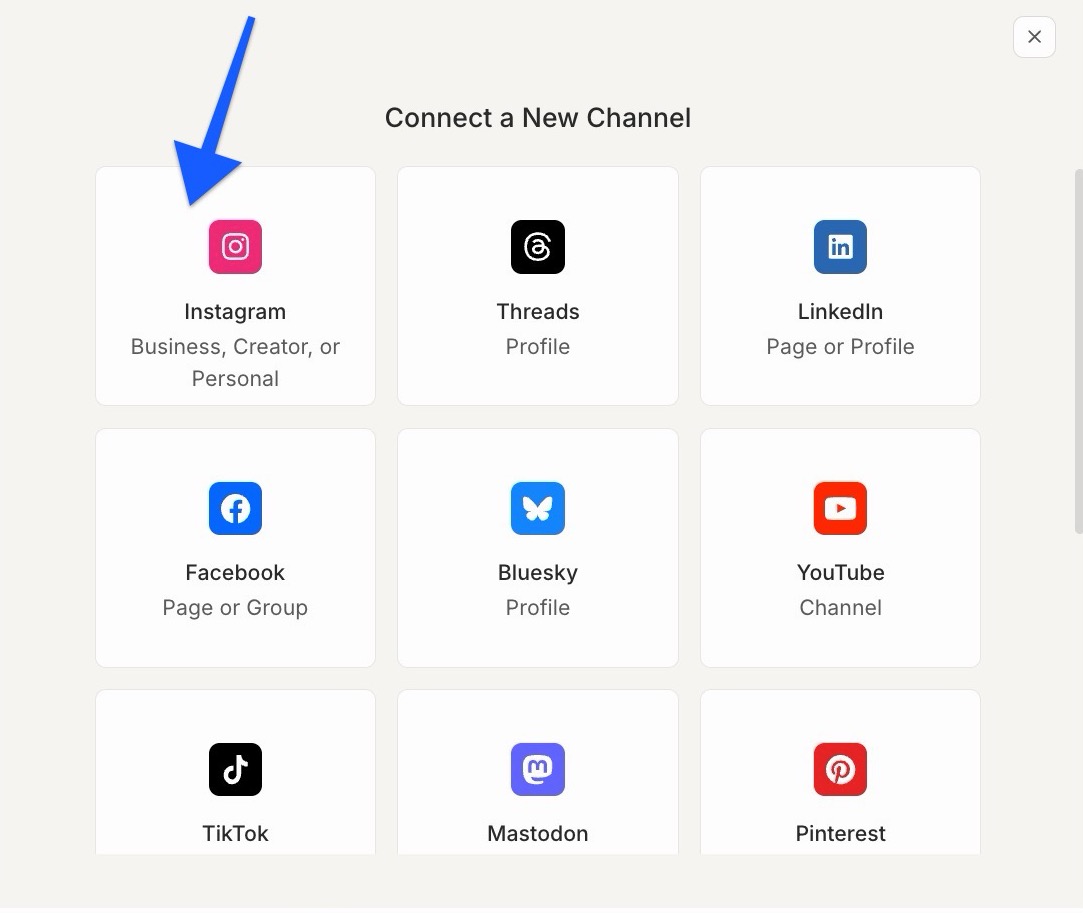
- Under “Personal,” select Setup a Personal Account.
- Enter your Instagram Personal account username and click Continue.
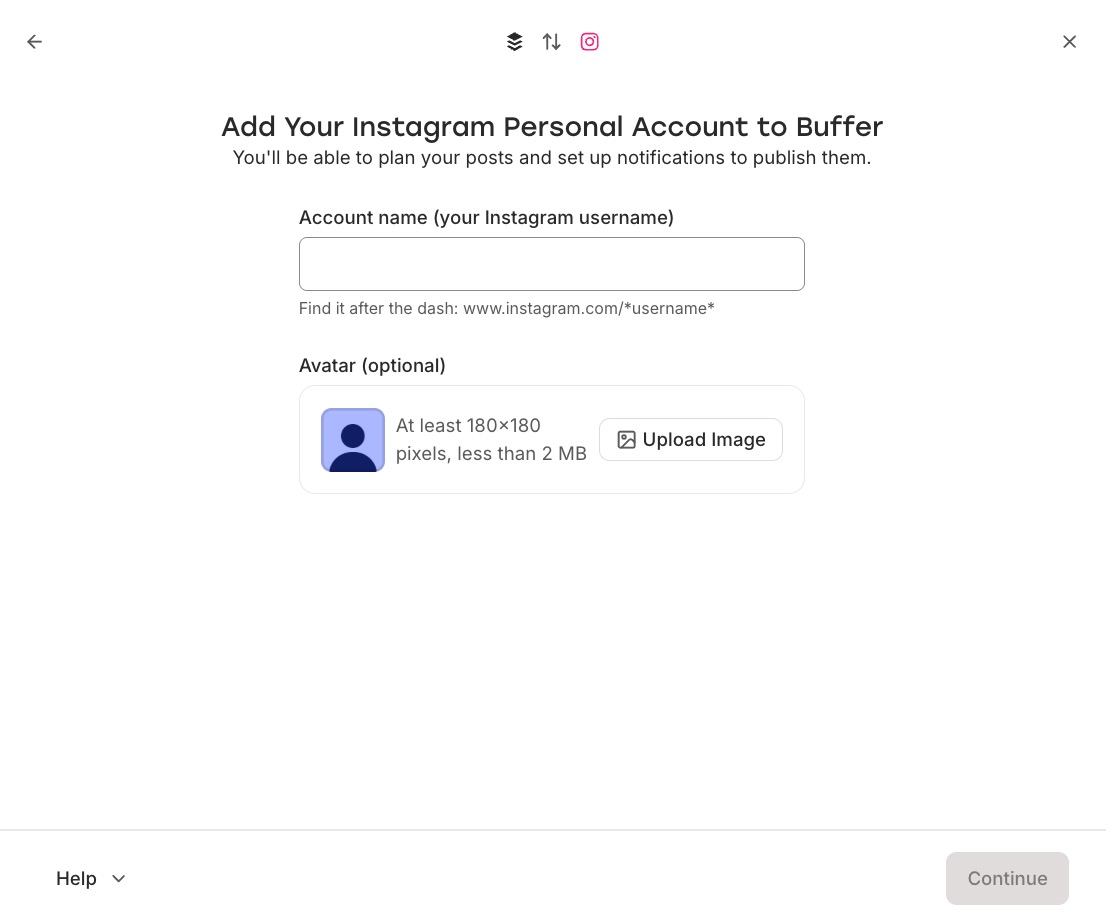
-
Set up mobile notifications if you haven’t already. Then you’ll be good to go!
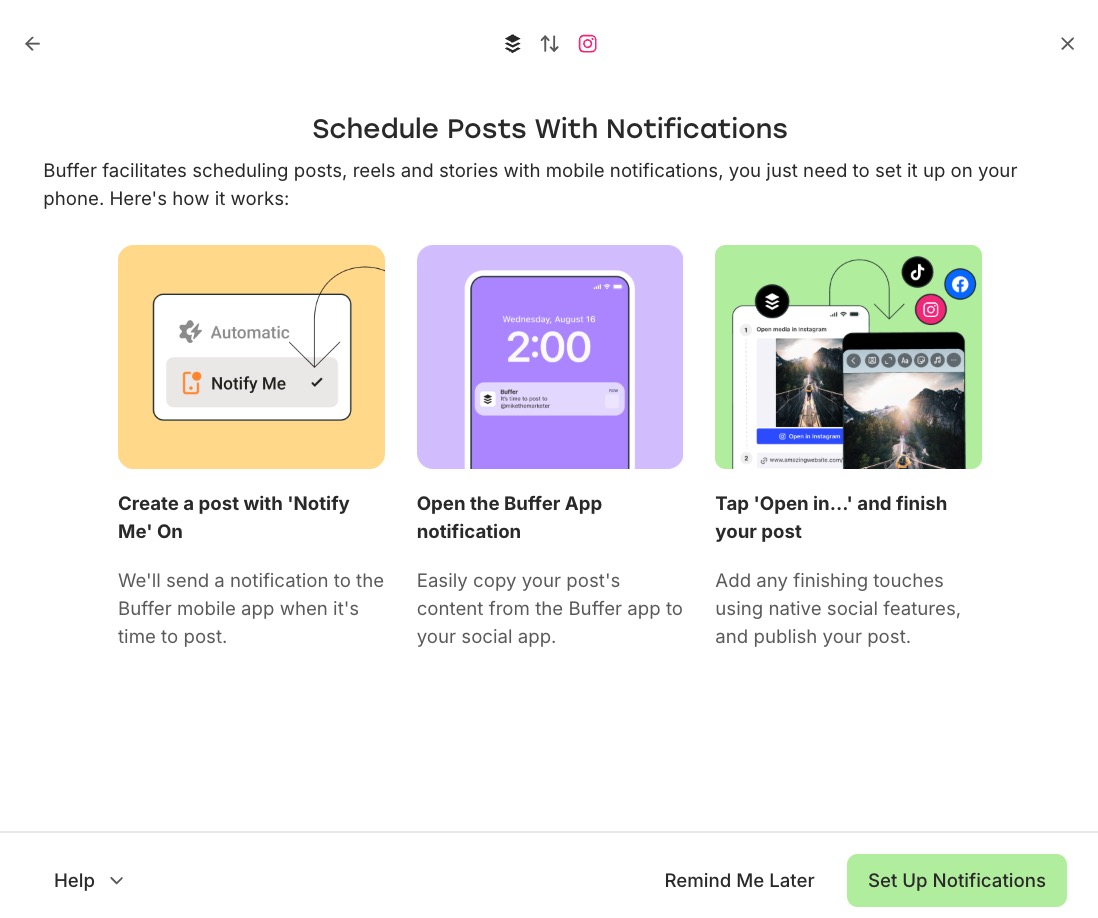
Switching a connected Instagram Personal account to a Professional account in Buffer
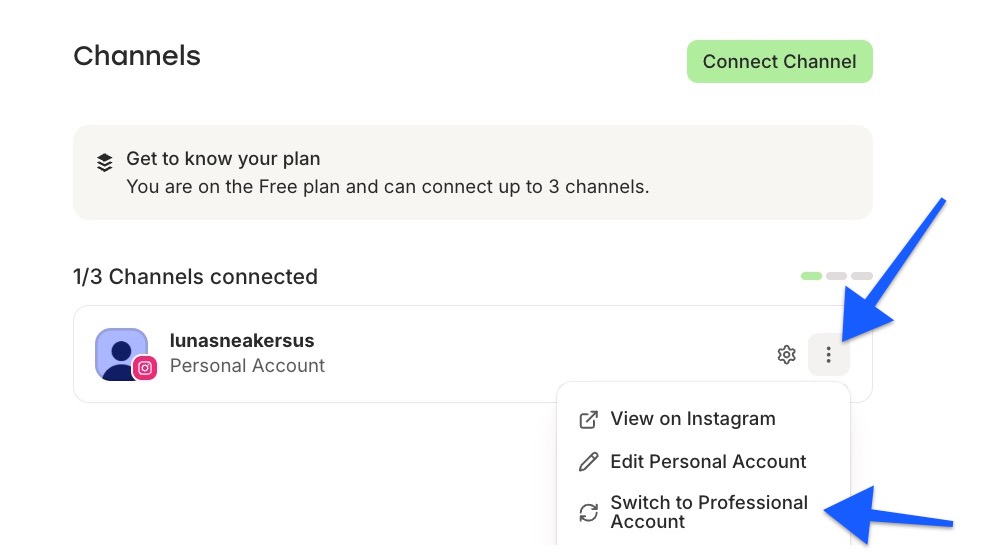
If you've already connected an Instagram Personal account to Buffer and want to switch it to a Professional account, head to your Channels page, click the 3-dot menu on the channel, and choose Switch to Professional Account.
Connecting an Instagram Professional (Business or Creator) account with your Instagram login
To connect a Professional account using this method, go to your Channels page, connect Instagram, select Connect to Instagram under Professional, then sign in with your Instagram username and password.
This connection method supports automatic publishing and comment management on all plans, and it’s the recommended option for Free plan users.
- 📝 This method doesn’t support advanced analytics or adding locations to Instagram posts. To use these features, connect Instagram through a linked Facebook Page using these steps.
- Managing multiple Instagram accounts under one Meta login? Buffer can only detect the account that is currently active in your browser. Make sure you're logged in to the correct Instagram account before connecting. More information on this here.
Steps:
- In Buffer, head to the Channels page, or click your profile avatar in the bottom left of your dashboard and choose Channels from the menu.
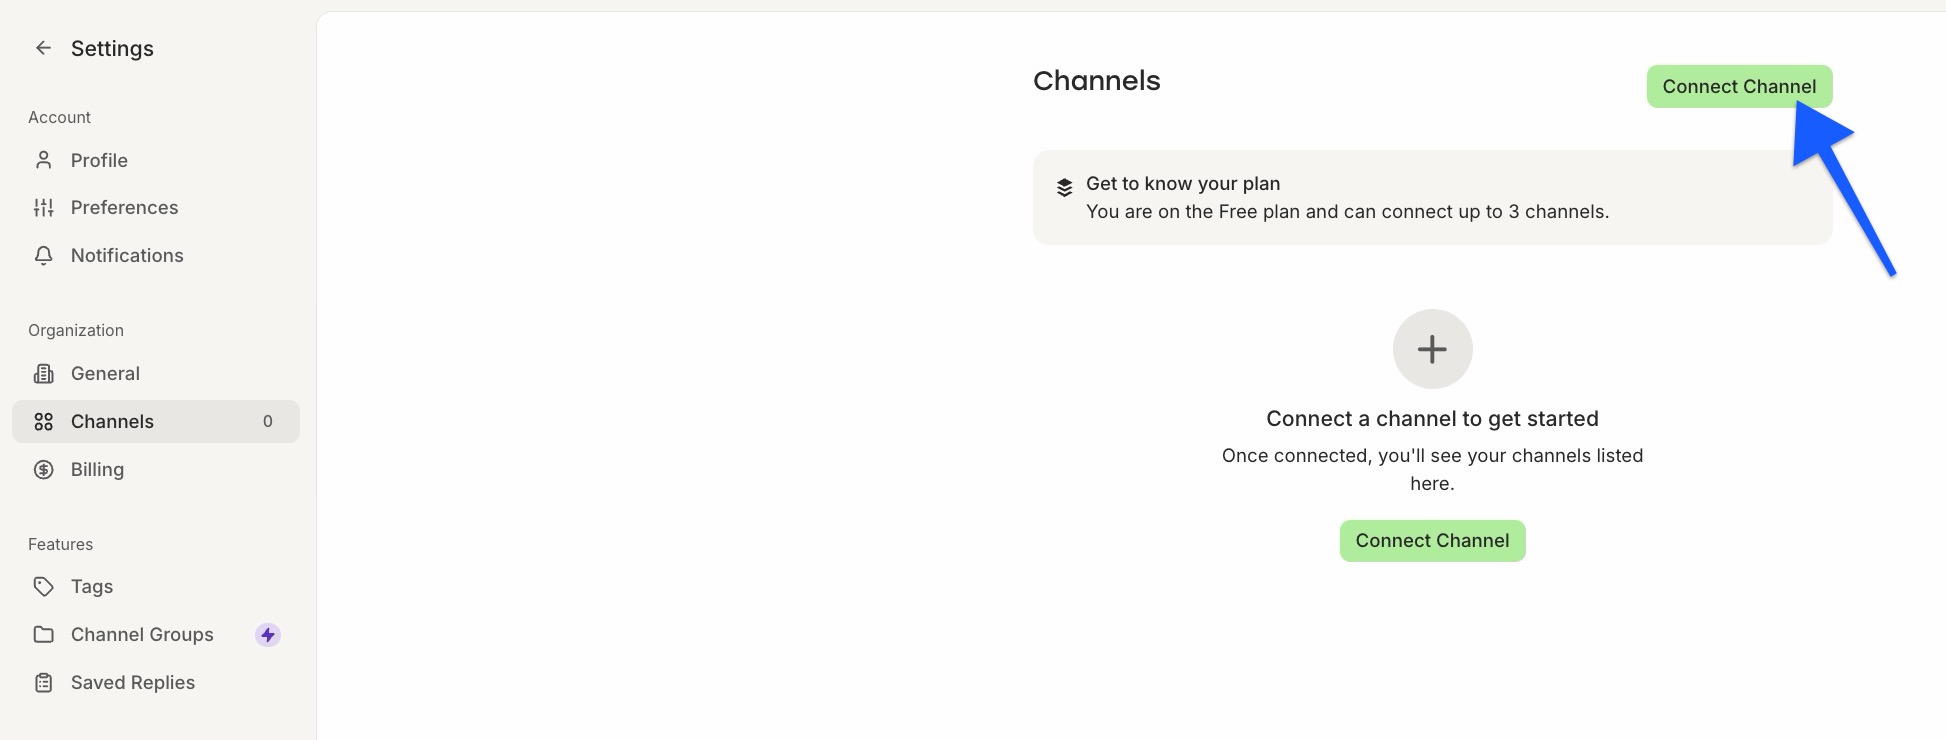
- Click Connect Channel and select Instagram.
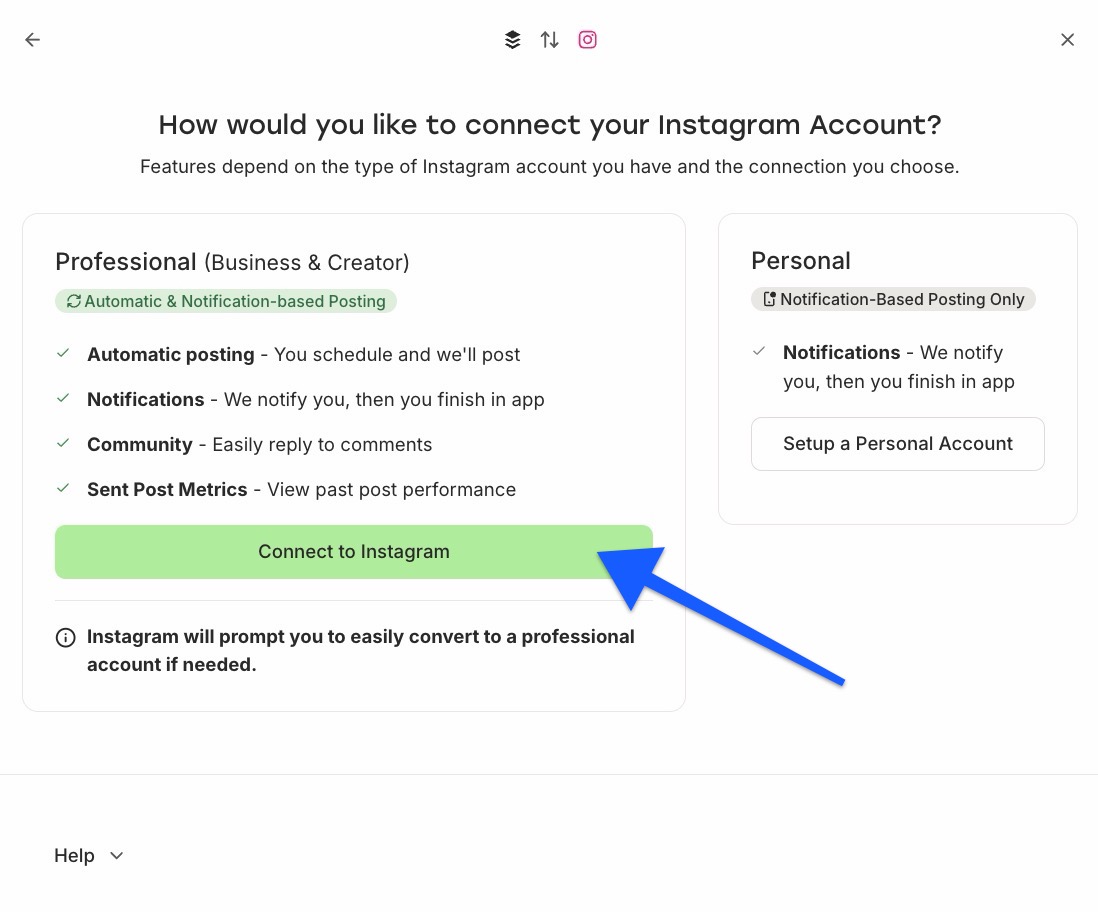
- Under “Professional,” select Connect to Instagram.
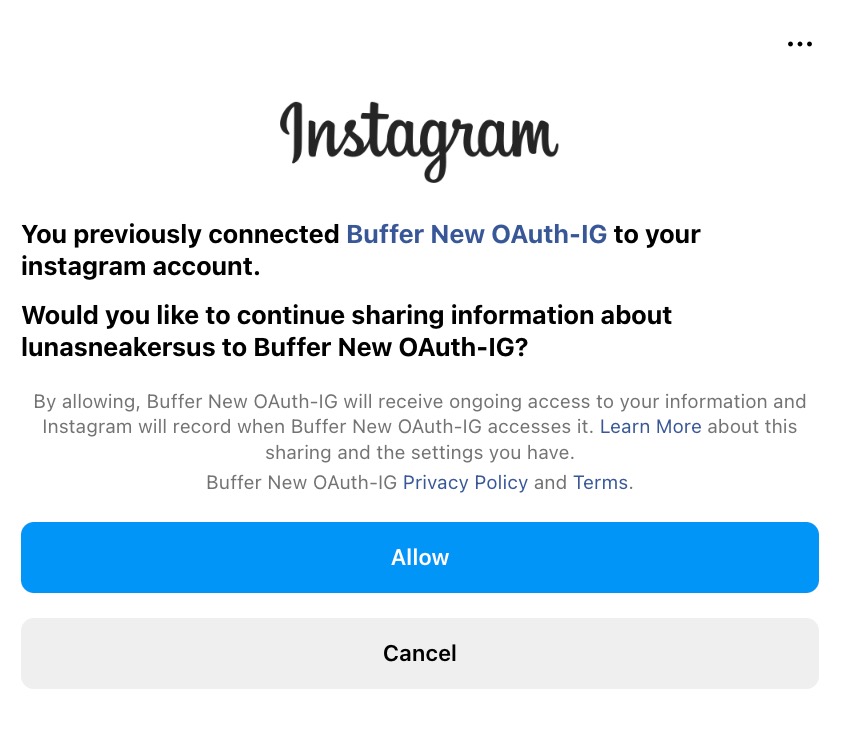
- You'll be prompted to log in to Instagram.
-
Select permissions. The first permission is required and will be automatically pre-selected, so it may look greyed out. When your permissions look like the screenshot below, click Allow to finish connecting.
📝 Having trouble? See our guide to common connection errors below for step-by-step fixes.
Connecting a Professional Instagram (Business or Creator) account through a linked Facebook Page
Connecting Instagram through a linked Facebook Page is the most reliable method and the only option that supports advanced analytics and adding locations to posts. We recommend it if you’re on a paid plan, manage Instagram through Meta Business Suite, or are having trouble connecting directly through Instagram.
To connect this way, log in with a Facebook profile that has admin access to the Facebook Page linked to your Instagram account.
Requirements:
✅ Instagram must be a Business or Creator account.
✅ Instagram must be linked to its own Facebook Page (a Page, not a personal profile). If you manage several Instagram accounts, each one needs its own separate Facebook Page.
✅ The person connecting must have Full control of the Page. Being a "partner" through Meta Business Manager is not enough on its own; you need Full control of the actual Page.
✅ All permissions for all Pages and Instagram accounts need to be selected during the channel connection, even for Pages you're not connecting to Buffer.
✅ If the Facebook Page enforces two-factor authentication, the admin connecting it also needs 2FA enabled on their Facebook account.
- Log in to Buffer on your computer (not the mobile app).
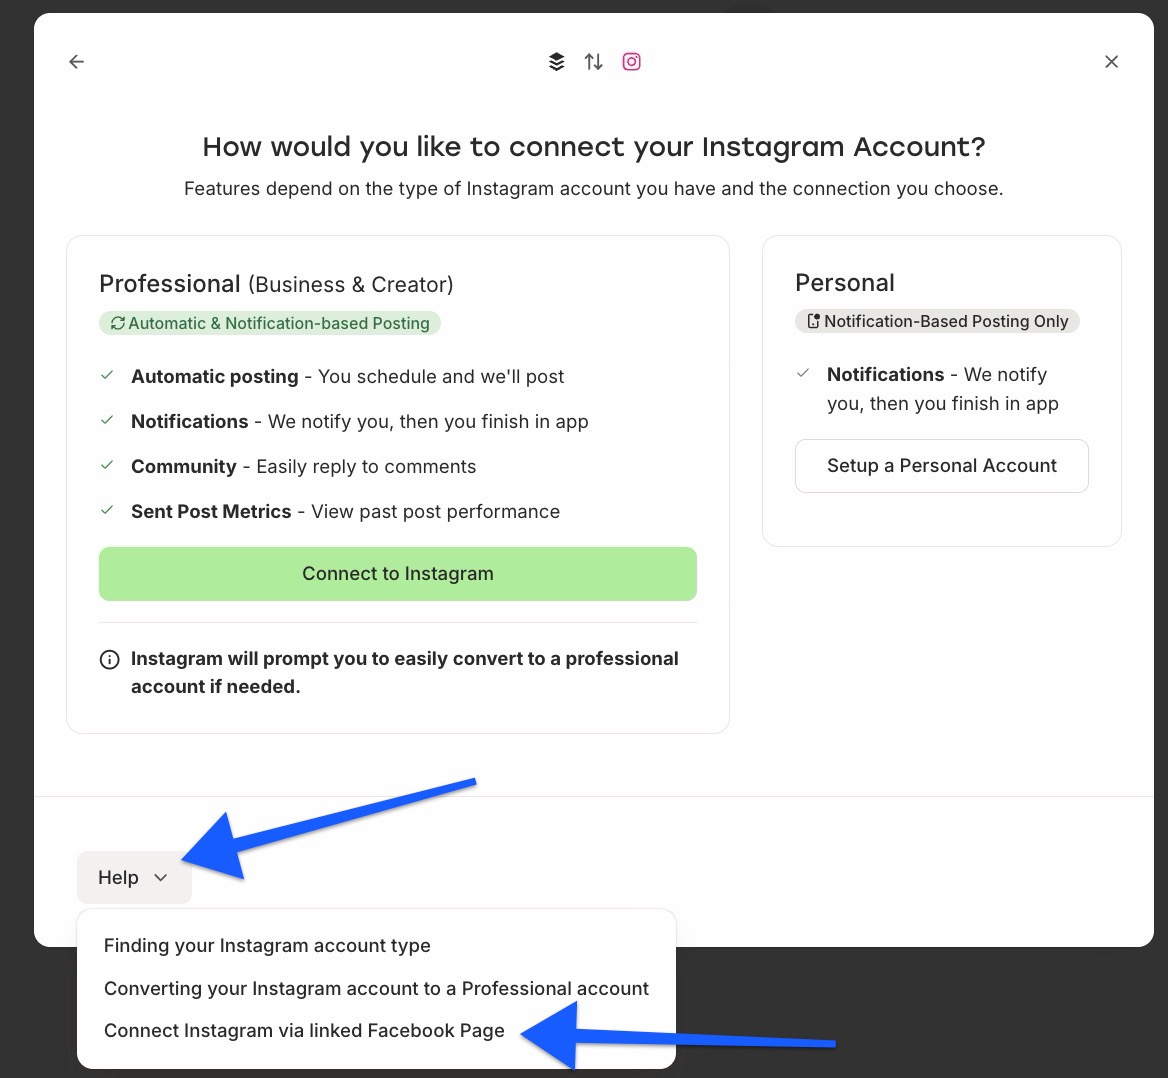
- Click here to manage channels, then choose Connect Channel and select Instagram.
-
Click the Help option in the bottom corner and choose Connect Instagram via linked Facebook Page.
- Log in with the Facebook profile that is an Admin on the Facebook Page.
- Choose the Instagram channel you want to connect.
-
Click Finish Connection.
- 📝 When you log in with Facebook, you'll authorize using your personal Facebook profile. This is expected: Meta uses your personal profile to check which Pages you're an admin of. Buffer does not access your personal profile or publish posts to it.
- If you're having trouble linking your Instagram account to a Facebook Page, our troubleshooting guide can help you get everything set up correctly. If your Instagram account is already connected and you’d like to use advanced analytics or add locations to posts, follow this guide to update your connection.
Connecting the right account when you manage more than one Instagram account
Buffer connects the Instagram account that’s currently active in your browser. Because there isn’t an account picker in Buffer, make sure you’re logged in only to the Instagram account you want to connect to.
If you manage multiple Instagram accounts, this is the most important step. Being logged in to the wrong account can cause a different account to connect, only one account to appear, or an “already connected” message.
In April 2026, Meta rolled out an update that lets you create several Instagram accounts under a single Meta login (rather than a separate email and password for each). If your accounts are tied to the same login, Buffer's connection flow may show only one of them, usually the account currently active in your browser.
This is especially likely if your "main" Instagram account is still a Personal account and you've since added Business or Creator accounts under the same login. In that case, Buffer defaults to asking you to convert the Personal account rather than detecting the Business accounts you actually want.
How to connect a specific account (or a second, third, and so on):
- Go to instagram.com and log out completely.
- Log back in using only the Instagram Business or Creator account you want to connect. This makes it the active session.
- Return to Buffer and follow the steps to connect your Professional account.
- Repeat for each additional account: log out of Instagram, log in as the next account, then connect it in Buffer.
💡Tip: Use an incognito or private browsing window if your browser keeps remembering past login credentials. A fresh private window is the quickest way to ensure Buffer sees the correct account.
📝 For older accounts with separate email and password credentials: If your Instagram accounts were created with separate emails rather than added under one Meta login, you may need to give each account its own password before you can connect it.
- Head to Instagram's password reset page, enter the handle of the account you want to connect, and reset its password. Once each account has its own login, connect them to Buffer one at a time.
Connecting a client's Instagram account (for agencies)
To connect a client’s Instagram account without asking them to share their login details, have the client make you an admin with Full control of their Facebook Page through Meta Business Suite. You can then connect their Instagram account to Buffer using the linked Facebook Page method and your own Facebook login. This is the most secure setup and avoids sharing credentials.
Troubleshooting common connection errors and issues
Find your exact error message or symptom below for step-by-step fixes.
Error: {"error_type": "OAuthException", "code": 400, "error_message": "Your activity off Meta technologies is currently turned off."}
This indicates a Meta privacy setting is blocking the connection, and you can fix it in the Instagram Accounts Center.
- Log in to the account on Instagram.
- Visit your Accounts Center activity settings.
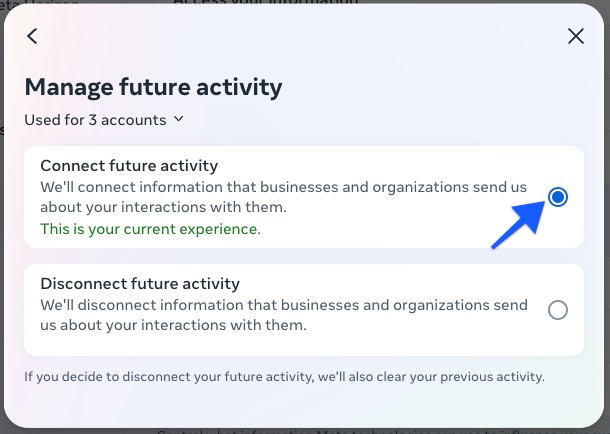
- Select Manage Future Activity.
-
To ensure things work properly, select Connect Future Activity.
- Try connecting Instagram to Buffer again.
📝 You may need to repeat these steps for each Instagram account you're connecting.
Error: Invalid session error 400
This is a known issue that Meta is working to resolve.
Troubleshooting steps:
In some cases, customers have been able to connect their Instagram account using these steps:
- In the Instagram app, go to Settings.
- Open Accounts Center > Your information & permissions.
- Go to Your Activity Off Meta technologies > Manage future activity.
- Toggle "Disconnect future activity" off and then back on.
Alternatively, you can link your Instagram account to a Facebook Page, then follow these steps to connect it to Buffer.
Error: Your Instagram account is ineligible for using Instagram Business Messaging API.
This is a rare Meta-side error that shows up sporadically when connecting through the direct Instagram login.
Troubleshooting steps:
As a workaround, you can link your Instagram account to a Facebook Page, then follow these steps to connect it to Buffer.
📝 Need help connecting your Instagram account? Send us an email at hello@buffer.com, and our Advocacy team will be standing by to assist!