Editing your images in Buffer
Sometimes, pictures we take require a few tweaks to get them ready for the eyes of our followers. Why not save time by making those tweaks right within your Buffer composer?
In this article:
- Editing an image in the same way for one or multiple social channels
- Editing an image differently for each social network you're posting to
- Using Buffer's new image editor (in Beta)
Editing an image in the same way for one or multiple social channels
While you’re able to create beautifully edited images within the Canva integration when uploading the image into Canva itself, it isn’t possible to use Canva to edit an image that was added from Dropbox, Google Drive, OneDrive, or directly from your computer into your Buffer composer. In these cases, you have the option to edit your image right there within the composer.
To begin editing an image, you'll go through the following steps:
- Click + New at the top of your dashboard, then Post.
- Select the social channels you'd like to post to.
- Upload your image from your computer or via the Dropbox, Google Drive, Google Photos, or OneDrive integration.
- Click on the editing button, which is a pencil icon.

- From there, you’ll be able to choose from several editing options.
- Crop (see "Notes" below).
- Rotate 45 degrees.
- Mirror.
- Flip (upside down).
- Blur.
- Sharpen.
- Enhance.
- Grayscale.
-
Invert (the colors).
📝 Notes
- When using the crop function, you'll have preset image size options for each platform to help you find the best image size for the platform you are scheduling the post to.
- e.g. for Instagram, you can select a 4:5 ratio, which falls within Instagram's accepted aspect ratio range for automatic posting
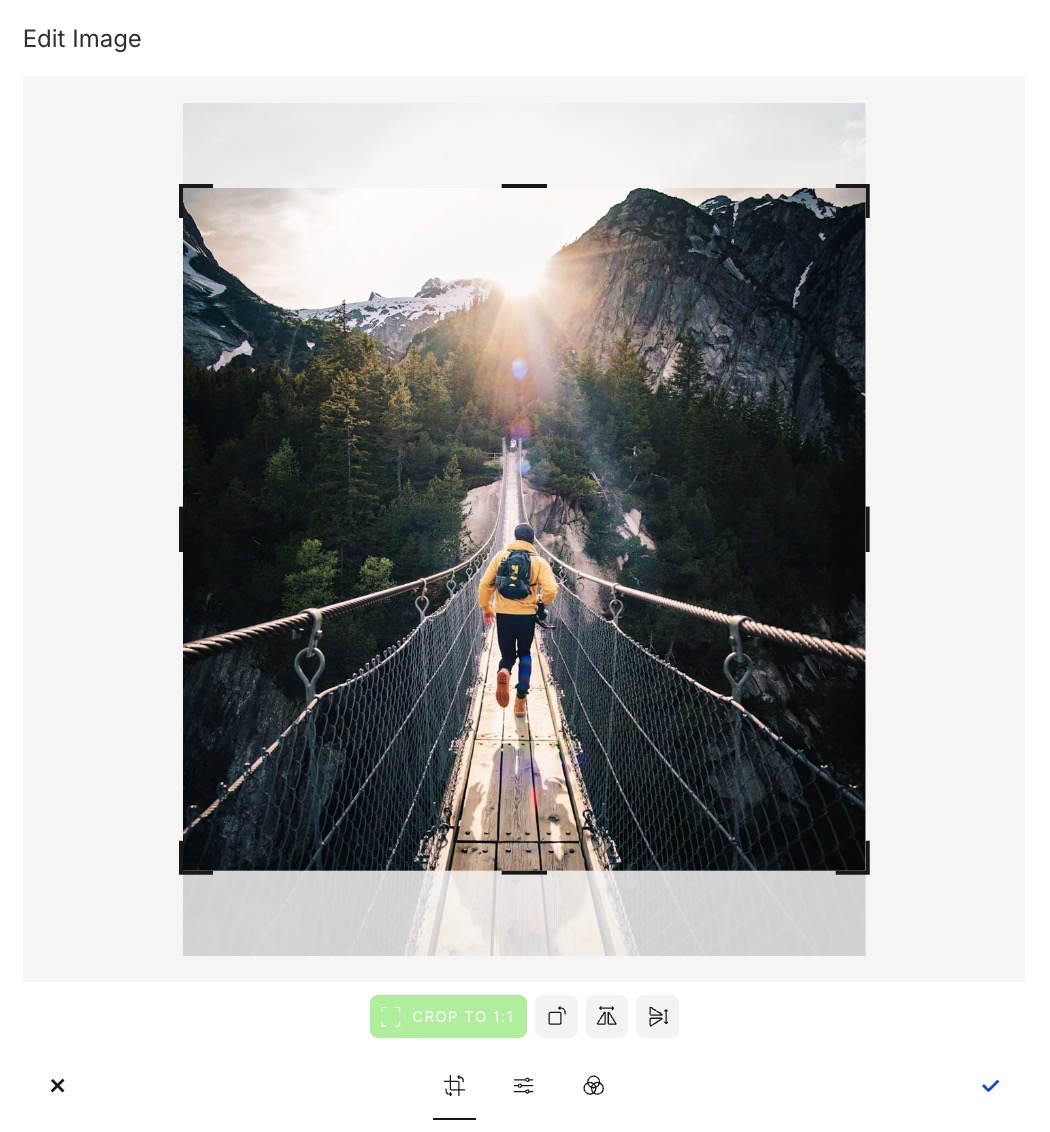
- When using the crop function, you'll have preset image size options for each platform to help you find the best image size for the platform you are scheduling the post to.
- Once finished editing, click Add, and your image will be added to the composer.
- From there, you can add the text for your post if you haven't done so already. For LinkedIn posts, you can add a caption for your photo and then add the text for your post.
-
If your image is the way you like it for all of the social channels you're posting to, edit the text for each social network as appropriate, choose a scheduling option, then click Schedule Posts to complete the process.
However, if you'd like to publish your post to multiple social channels but want the image to be different for each channel, skip to the next section.
📝 The image editor doesn’t include some options you might enjoy, such as brightening, contrast, custom image sizes, and filters. The Canva integration does resolve all of these, but note that when using Canva, the image will need to be uploaded from your computer into Canva either through your native account or through the Canva Buffer integration.
Editing an image differently for each social network you're posting to
If you edit an image before you’ve clicked Customize for each network or before you click on additional social channel icons to send your post to, the image you just edited will attach to all of the social network composers. There isn't a way to alter these images at that point, so if you'd prefer to edit the image differently for each social network, it's best to first select all of the social channels you'd like to post to and then edit the image within each of the respective composers.
It's always healthy to provide unique content for each social network, so if this feels like editing each in their own unique way could work for your design, go for it!
The GIF below shows you how you can upload an image one time, edit it, and then head to the next social network composer to either select the same edited image or to select the original image that you can then edit from scratch.
As you might notice, even when you take the time to customize your image for each social network, the editing process is pretty quick!

Using Buffer's new image editor (in Beta)
⭐ We're testing a new, in-house image editor as a beta feature. It's built to be faster and more flexible than the editor described above, and it's still being refined based on feedback. Learn more on how to test Buffer's Beta features here.
You can turn the new editor on (or switch back to the version described above at any time) under Settings → Beta features.
What's different in the new editor
- Crop, rotate, flip, and zoom your images with more precise control over framing.
- Move between every image attached to a post without closing the editor, so you can edit a whole batch of images in one sitting.
- Add alt text, including generating it with AI, without leaving the editing view.
- Tag people in Instagram images directly from the editor.
How to use the new editor
- Click + New at the top of your dashboard, then Post.
- Select the social channels you'd like to post to.
- Upload your image from your computer or via the Dropbox, Google Drive, Google Photos, or OneDrive integration.
- Hover over the image and then click the pencil icon on the image to open the editor.
- Use the toolbar to crop, rotate, flip, or zoom the image.
- If your post includes more than one image, use the image strip to move between images and edit each one without closing the editor.
- To add alt text, click the Alt Text tab. Type your own, or click Generate with AI for a suggestion you can review and edit.
- If you're posting to Instagram, select Tag people, click on the image where you'd like to add a tag, then enter the username.
- Once finished, click Add, and your image will be added to the composer.

📝 Good to Knows
- Some editing options from the current editor (blur, sharpen, enhance, grayscale, and invert) aren't part of the new editor yet. Use the Canva integration if you need these effects in the meantime.
- For more on alt text support by network, see Adding alt text to your images.
FAQ
How do I turn on the new image editor?
Click your profile icon in the lower left corner of the web dashboard and select Beta features to open Beta settings. Then, toggle it on from there. You can switch back to the current editor the same way at any time.
What happened to filters like grayscale or blur in the new editor?
Those options are part of the current editor and aren't in the new beta editor yet. For those effects, use the Canva integration.
📝 Need help with the image editor? Send us an email at hello@buffer.com and our Advocacy team will be standing by to assist!