
Shortening and unshortening links
By default, links in Buffer are not shortened, however, you can choose to have your links shortened automatically if you prefer. This guide will walk you through options to display your links as you wish.
:::info Looking for the mobile version? See Shortening and unshortening links on the Buffer mobile app. :::
Enabling link shortening
If you prefer not to display the full URL in your post, you can enable link shortening within your channel settings. Link shorteners are set individually for each social channel, meaning you might use buff.ly for some channels or choose to have No Shortening enabled for others.
Your channel's link shortening setting applies to posts you create in the web composer, the Buffer mobile app, and Buffer's MCP server. Links in those posts are shortened automatically when link shortening is turned on for the channel.
📝 Note: Posts sent to Buffer from third-party tools through our public API (for example, Zapier) may still keep the full URL for now. We're working on a fix. In the meantime, you can shorten a link in a queued post by opening it in the composer and using the link shortening button.
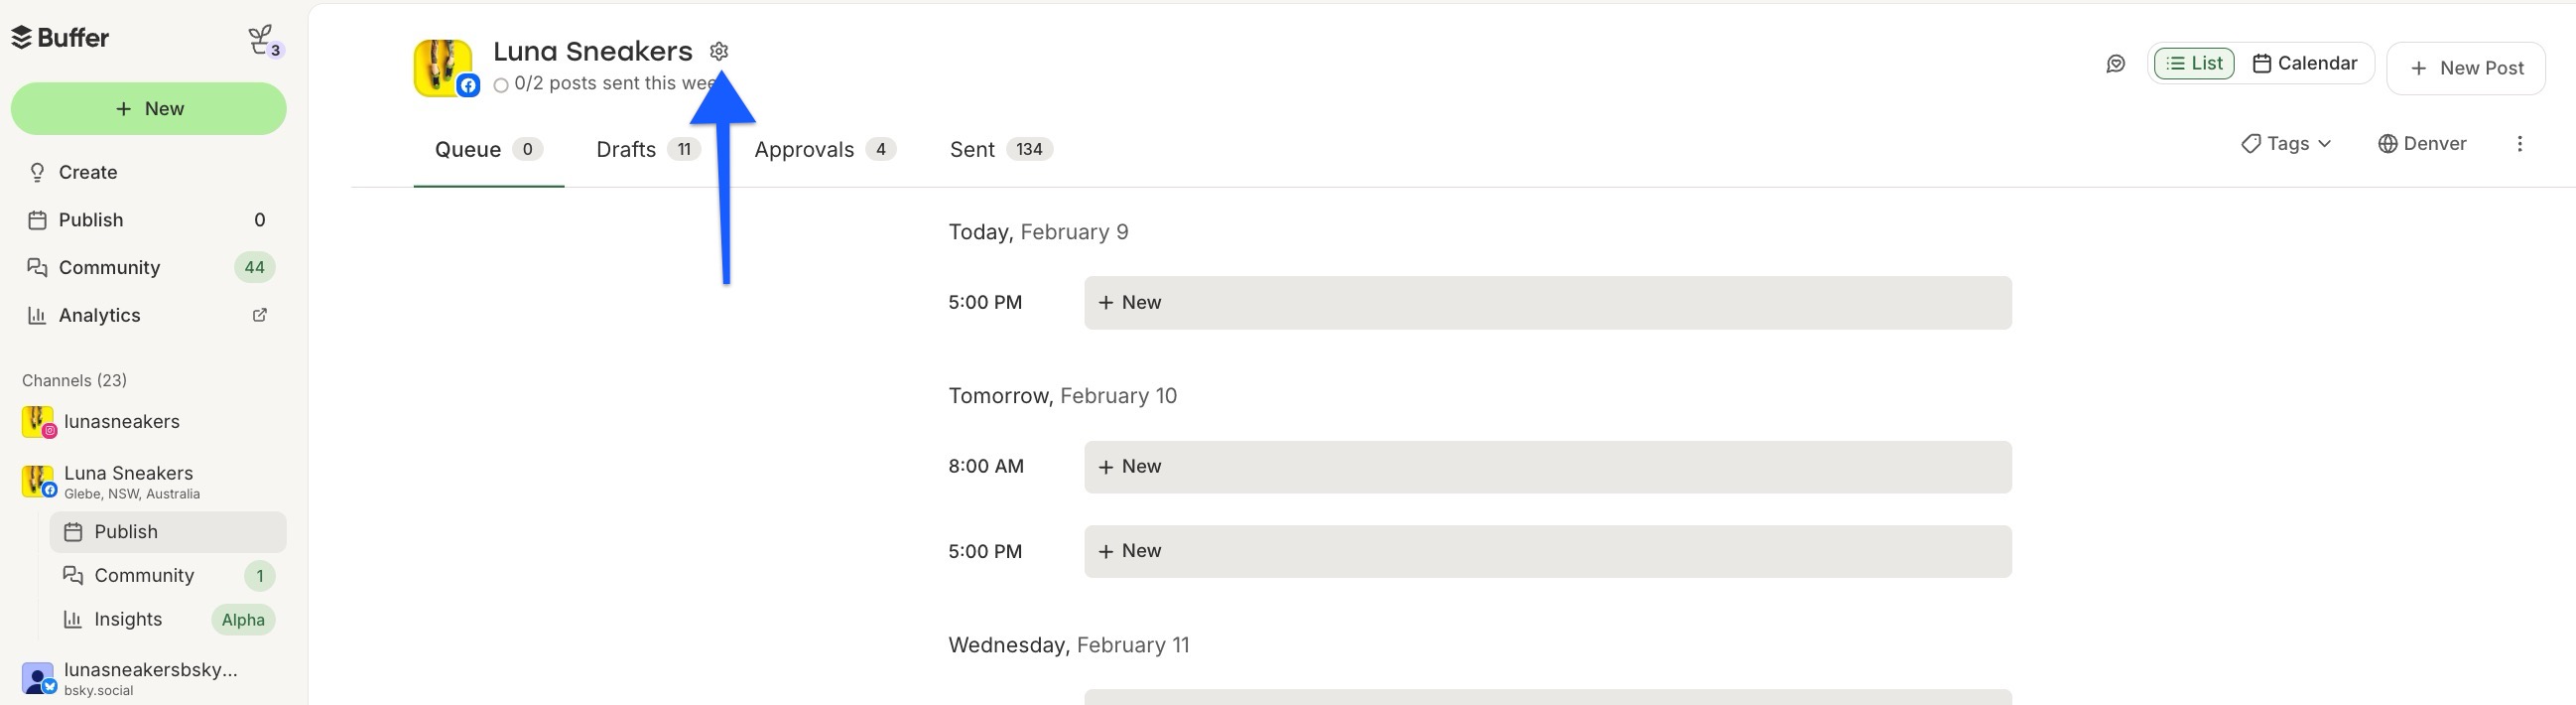
To enable link shortening for a particular channel, select the channel on the left-hand side of your dashboard, and then select the gear icon next to the channel name.
Under the General tab, you'll find a section at the top called "Link Shortening." In the drop down menu, you can choose between buff.ly or select No Shortening if you want to disable link shortening completely.
Some social networks do not support or encourage the use of link shortening. For example:
- At the moment, Pinterest does not allow posting of shortened links to their platform.
- Similarly, using a link shortener on Mastodon is actively discouraged.
- While you can create posts with links on Instagram, Instagram does not allow clickable links in the post captions. Additionally, Instagram posts with links in the captions may be flagged for spam. To send followers to a specific link, check out our Instagram Shop Grid feature.
Therefore, we do not support link shortening on Pinterest, Mastodon, or Instagram in Buffer.
:::tip 📽️ If you'd like to see these instructions in video form, head to our article "Getting started with Buffer's publishing features" and click on the desired chapter. :::
Turning off link shortening
If you had link shortening enabled for your channel but change your mind and want to show the full URL instead, you can easily turn off link shortening with a few steps. First, click the gear icon next to the channel name.
From the Settings page, make sure the General tab is selected, then select No Shortening from the dropdown. None of your links for this channel will be shortened and the Link Shortening button will not appear in the composer.
Shortening and unshortening individual links
If link shortening is not enabled for your channel, but you'd like to shorten an individual link in your post, you can use the link shortening button in the composer to do so.
Similarly, if link shortening is enabled for your channel but you have a link that you'd like to show the full URL for, you can use the link shortening button to keep the link unshortened in your post.
Setting up your custom link shortener
:::warning You must be registered with Bitly to use the custom link shortener option. :::
️ If you have multiple Bitly accounts, log out before walking through the steps below to ensure we retrieve the correct one.
- Register the domain you'd like to use
It’s important to note that this domain can only be used for shortened URLs. Your short domain name needs to be 15 characters or less (including the dot and extension), or your links won’t display your custom URL.
- Add your domain to Bitly
You'll need to sign in or register for a Bitly account. Once you’ve logged into Bitly, you’ll need to go to Settings in the top right hand corner, and then click on the Advanced button.
Under the Branded Short Domain header, select whether you’re using your short domain for personal or business use. Bitly should then ask you to verify your email address.
- Create a DNS record for your domain name
The next step involves changing your DNS information. A DNS is what makes a browser point to a website, so this is where you’re telling your custom short domain to point to Bitly. To update your DNS information, you’ll need to go to the website where you registered your domain name.
Updating your DNS is typically pretty simple and should be very similar to the instruction below, even if you don’t use Name.com. For Name.com customers, you would log into your Name.com account, click on your short URL, and then click on Update DNS records.
You would then need to edit the A record for your site. You can do this by changing the IP address to 69.58.188.49. If there isn’t an existing A record, add a new one. Where you see host, you can either leave it blank or add an @ sign. Either option works because they do the same thing. It’s also important to note that you should only have one A record. If you have more than one A record, you should remove all of them that don’t point to Bitly’s 69.58.188.49 IP address.
- Verify your domain ownership
Now that your A record has been added to your domain name you need to go back to the Branding Domains Settings on Bitly and click the Verify button. When you do this, your domain should then be connected to your Bitly account.
- Connect your Bitly account to your Buffer account
Next, log into your Buffer account, select the channel on the left hand side of your dashboard that you'd like to change, and click the gear icon next to the channel name**.**
Make sure the General tab is selected and then under "Link Shortening," click the dropdown menu and select Connect Bit.ly. Follow the steps to authorize Buffer to connect to your Bitly account.
- Try it out!
Finally, schedule a new post, paste a link into the composer, and make sure it's shortened using your new custom link shortener!
FAQ
What happens when a Bitly account reaches its shortening limit?
If Bitly limits are reached or your Bitly account is restricted, Buffer will not automatically switch to another link shortener or fallback service. Instead, if Buffer can't shorten a link via Bitly, the post will simply use the original (long) URL in your post.
Why do links in posts from Zapier or other tools still show the full URL?
Posts sent to Buffer through our public API by third-party tools may keep their original URL even when link shortening is turned on for the channel. We're working on a fix. Until then, you can open the queued post in Buffer and use the link shortening button in the composer to shorten the link before it publishes.
Other articles that might be helpful
- Troubleshooting issues with suggested media and link details
- Scheduling posts
- Shortening and unshortening links on the Buffer mobile app
:::info Have a question about link shortening? Send us an email at hello@buffer.com, and our Customer Advocates would love to help! :::